• Ir a la navegación principal
  • Saltar al contenido principal
  • Saltar a la barra lateral primaria

Indian Cooking School

Indian Cuisine - Recipes, Tutorials, Reviews

  • About Us
  • Blog
  • Contact Us
Estás aquí: Casa / Archives for Indian Recipes

Recetas Indias

Exploring the Versatility of Paneer: From Saag Paneer to Paneer Tikka

January 24, 2023 por Staff Cook

Paneer being cut

What Is Paneer?

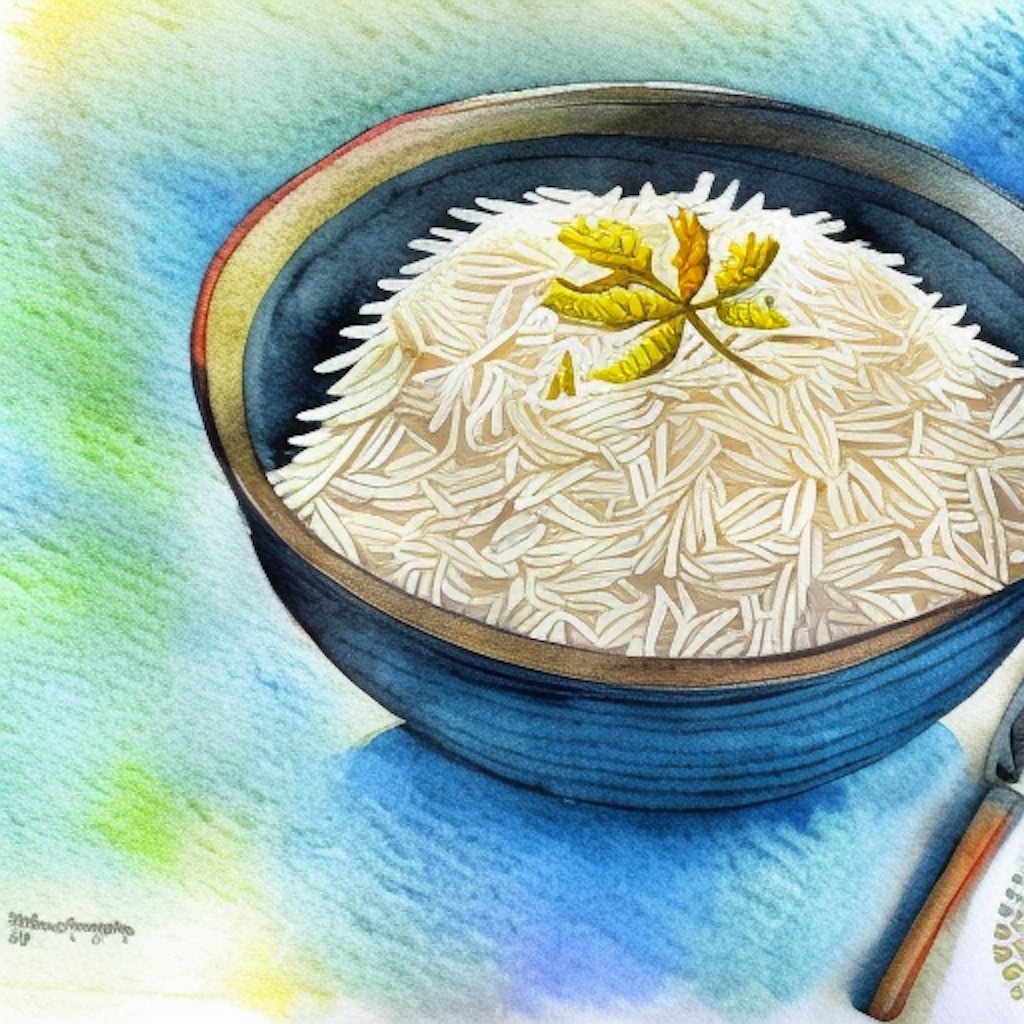
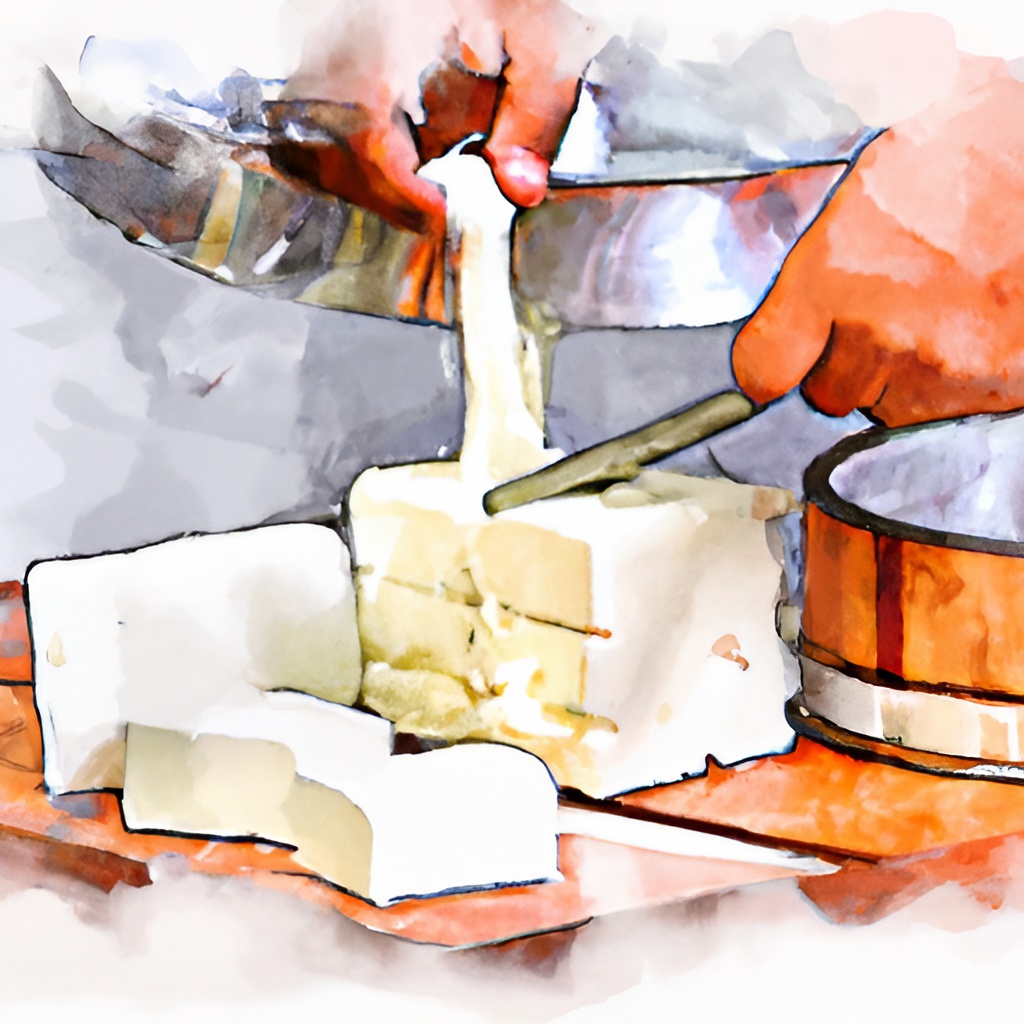
Paneer is an unaged cheese that is popular in Indian cuisine. It is made by curdling cow’s or buffalo’s milk with lemon juice, vinegar, or another acidic ingredient. The resulting whey is then strained and pressed in muslin cheesecloth to create a firm block of cheese. Paneer has a firm and slightly crumbly texture, a mild and tangy flavor, and does not melt when heated. Paneer is completely vegetarian-friendly and can be used to make a variety of tasty dishes, from pakora to curries.

How is Paneer Used in Indian Cooking?

Paneer is a versatile ingredient that is used in a variety of dishes in Indian cuisine. Some common uses for paneer include:

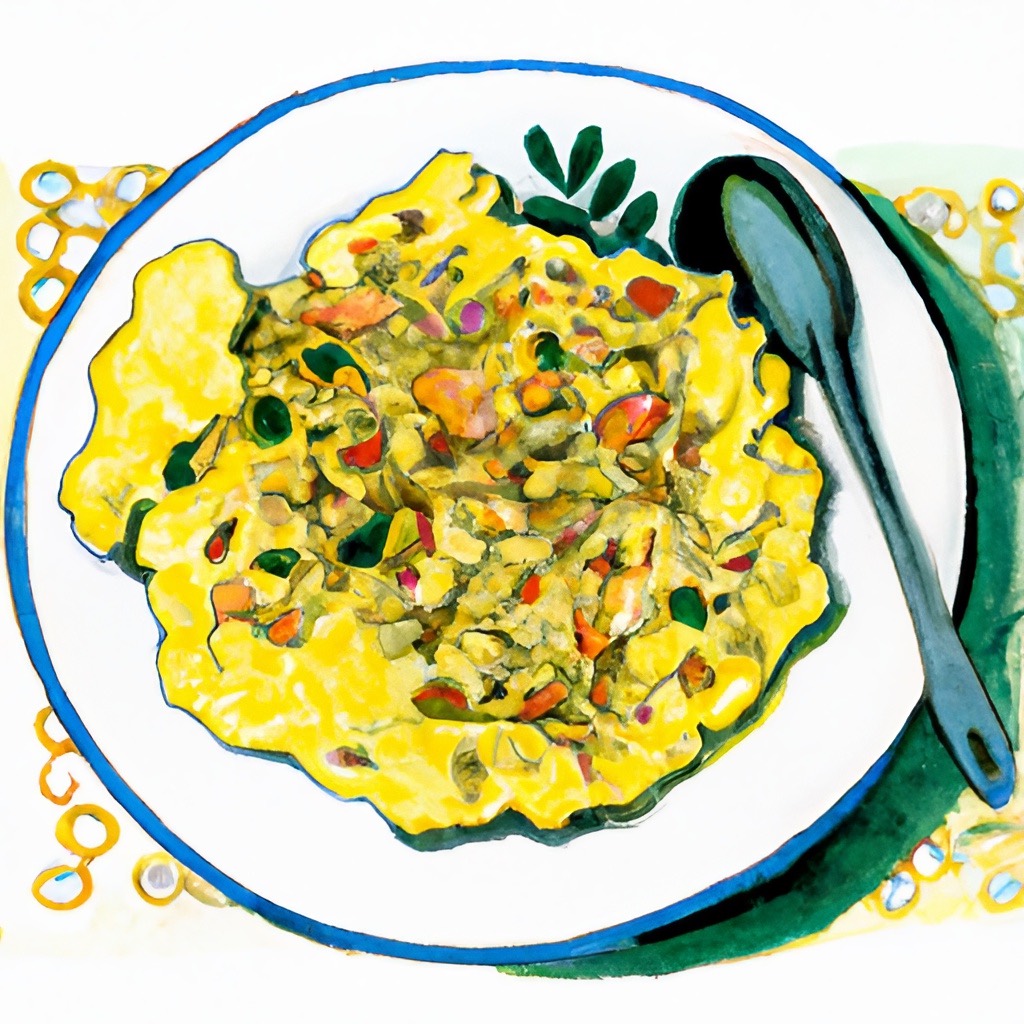
  • Saag paneer: Saag paneer is a popular Indian dish made by cooking chopped paneer in a spicy and creamy spinach sauce. It is typically served with naan, rice or roti.
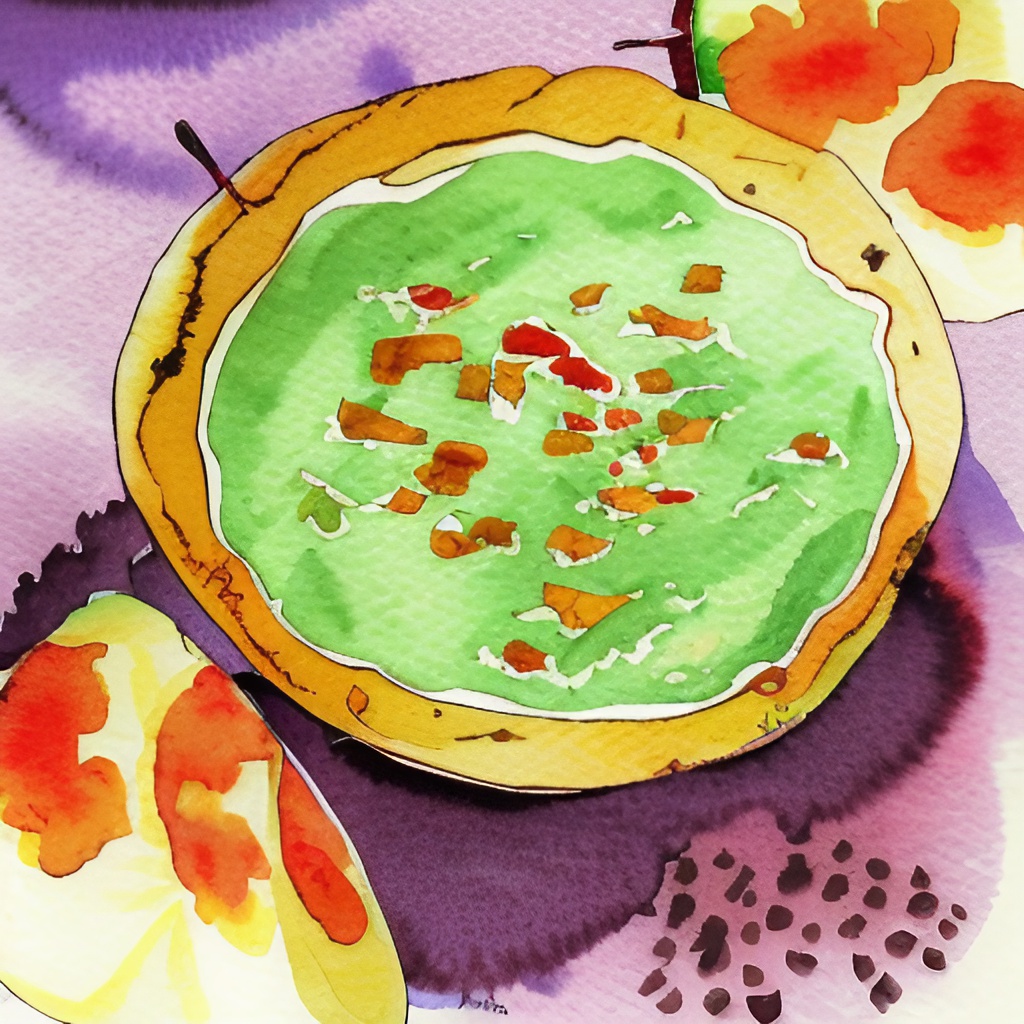
  • Palak paneer: Palak paneer is a similar dish to saag paneer, but it is made with a pureed spinach sauce instead of chopped spinach. It is also typically served with naan, rice, or roti.
  • Paneer tikka: Paneer tikka is a popular Indian snack made by marinating paneer cubes in a mixture of spices and herbs and then grilling or frying them until they are crisp and golden. It is typically served with a variety of chutneys or sauces.
  • Paneer paratha: Paneer paratha is a popular Indian breakfast dish made by stuffing a roti with a filling of spiced paneer and vegetables and then grilling or frying it until it is crisp and golden. It is typically served with a variety of chutneys or sauces.

Buying Paneer vs Making Paneer

Paneer is now available in most Indian grocery stores. We’ve even seen it in normal grocery stores such as Whole Foods and Costco. It is a perfectly valid shortcut to buy paneer for your dishes.

However, making paneer at home is fun and satisfying. It allows you greater control over texture and allows you to customize flavor by adding spices during the cooking process.

Paneer Recipe

ingredientes

  • 1 gallon whole milk
  • 1/4 cup lemon juice or vinegar*
  • 1/2 tsp salt* The amount of acid required to make paneer will vary depending on the quality of the milk used. Milk with a higher fat content will require more acid to curdle and create cheese.

Instrucciones

  1. In a large saucepan, heat the milk over medium-low heat until it reaches a gentle boil–stir occasionally.
  2. The milk should begin to curdle immediately. After the milk has curdled completely and you see a bit of green whey take it off the heat.
  3. Strain the curdled milk through a cheesecloth-lined colander, and let it sit for 20-30 minutes to allow the whey to drain off.
  4. Carefully gather the corners of the cheesecloth and twist them tightly to form a ball of paneer.
  5. Run clean water over the cloth to rinse to reduce the acid flavors.
  6. Place the paneer in a colander and press it gently with a plate or a pot lid to remove any excess whey. For firmer paneer, put a one-pound weight on the plate and let it sit for an hour.
  7. Transfer the paneer to a clean bowl and stir in the salt.
  8. Cover the bowl with plastic wrap and refrigerate the paneer for at least 4 hours or until it is firm and chilled.
  9. Cut the paneer into cubes or slices, and use it in your favorite Indian dishes.

Five Food Acids that Curdle Milk for Paneer

You can use a variety of acids to curdle the milk. Each gives it the paneer a slightly different characteristic.

  1. Lemon juice or lime juice: Add 1/4 cup for a gallon of milk for a soft and firm texture.
  2. Vinegar: Add 1/4 cup of white vinegar or apple cider vinegar for a faster curdling process and a firm and soft texture.
  3. Curd or yogurt: Add between 1/4 cup to 1/2 cup of fresh curd or yogurt for a softer and moister paneer.
  4. Buttermilk: Add between 1/4 cup to 1/2 cup of buttermilk for a soft and firm paneer.
  5. Citric acid: Citric acid is used in the commercial production of paneer and will give you firm paneer.

Paneer Recipe Variations

  • Vary the flavor of the paneer by adding spices, such as cumin, cilantro, or ginger, to the milk before curdling it.
  • Vary the texture of the paneer by pressing it more or less firmly to remove the whey. A firmer paneer will have a drier and more crumbly texture, while a softer paneer will have a moister and more creamy texture.
  • Vary the acidity of the paneer by using different acidic ingredients to curdle the milk, such as vinegar, citric acid, or buttermilk.

How to Store Paneer

Storing paneer is easy and it will last for about a week in the refrigerator if stored properly. primero, ensure the paneer is wrapped tightly in plastic or aluminum foil to prevent any air from getting in. Secondly, place the wrapped paneer in an airtight container or resealable plastic bag before storing it in the refrigerator. It is also important to note that if you see any mold or discoloration on the paneer, it should be discarded immediately as it is no longer safe to consume. Additionally, if you have a large block of paneer and don’t plan on using it all within a week, you can freeze it for up to 2 months. Make sure to wrap it tightly in plastic or aluminum foil before placing it in an airtight container or resealable plastic bag before storing it in the freezer.

Uses for Paneer Whey

Paneer whey is the liquid that is left over after making paneer. It is a by-product of the paneer-making process and is rich in protein, vitamins, and minerals. Paneer whey can be used for various purposes and has several benefits. Some of the ways paneer whey can be used include:

  1. As a protein supplement: Paneer whey is a good source of protein and can be used as a supplement for those looking to increase their protein intake.
  2. As a cooking ingredient: Paneer whey can replace water or milk in recipes such as curries, soups, and stews.
  3. For fermentation: Paneer whey can make probiotic-rich foods such as kombucha, kefir, and yogurt.
  4. For baking: Paneer whey can replace milk or water to add protein and moisture to baked goods.
  5. As a fertilizer: Paneer whey can be used as a fertilizer for plants as it contains beneficial nutrients.

It’s important to note that whey should be consumed or used within 2-3 days of making the paneer, as it has a high water content and will spoil if not stored properly.

archivado: Recetas Indias, ingredientes

Basmati Rice: The Fragrant Staple of Indian Cuisine

January 21, 2023 por Redactor del personal

Basmati Rice in a blue bowl

Basmati rice is a type of long-grain rice that is native to the Indian subcontinent. It is known for its distinctive aroma and flavor and has been an important part of Indian cuisine for centuries.

The history of basmati rice can be traced back to the Indian states of Punjab and Haryana, where it has been grown for centuries. The word “basmati” means “fragrant” en Hindú, and refers to the rice’s unique aroma derived from its high levels of natural oils and sugars.

Basmati rice was traditionally grown in the fertile soil of the Indo-Gangetic plain, which stretches across northern India and parts of Pakistan. It was an important part of the diet of the local people and was often used in religious ceremonies and festivals.

In the 19th and 20th centuries, basmati rice began to be exported to other parts of the world, where it became popular for its unique flavor and aroma. It is grown in several countries, including India, Pakistan, Nepal, and the United States.

Attempt to Patent Basmati Rice in the US

In 1997, RiceTec attempted to trademark and patent basmati rice in the United States. They claimed that they had developed a new variety of basmati rice genetically modified to have improved yield, disease resistance, and flavor.

However, their efforts were met with strong opposition from Indian farmers and advocacy groups, who argued that basmati rice was a traditional and culturally significant crop that a single company should not own. They also pointed out that RiceTec’s variety was not truly basmati, as it did not have the same aroma and flavor as traditional basmati rice.

In 2001, the United States Patent and Trademark Office ruled against RiceTec, stating that basmati rice was a “generic term” that could not be patented. The United States Court of Appeals upheld the decision in 2003.

Since then, attempts to patent and trademark basmati rice in the United States have been unsuccessful. Hoy, basmati rice continues to be grown and enjoyed around the world and remains an important part of India’s cultural and culinary heritage.

Brands of Basmati Rice in the US

Some popular brands of Basmati rice highly recommended by users include Tilda, Daawat, and Royal. Tilda is known for its long and slender grains that retain their shape and texture when cooked. Daawat is a well-known brand preferred for its delicious flavor, aroma, and perfect texture of cooked rice. Royal basmati rice is also a preferred brand, known for its nutty aroma and fluffy texture when cooked, making it perfect for traditional dishes like biryani and pulao. Other common brands include Kohinoor, India Gate, and Ashoka. These are considered high-quality and authentic brands of Basmati rice that are widely available and easily accessible in Indian grocery stores, some supermarkets, and even Costco.

Basmati Rice Recipe–Stovetop method

ingredientes

  • 1 cup basmati rice
  • 1.5 cups water
  • 1 tsp ghee or oil
  • 1/2 tsp salt
  • 1/2 tsp cumin seeds
  • 1/2 tsp cardamom seeds
  • 1/2 tsp cinnamon
  • 1/2 tsp cloves
  • 1/2 tsp bay leaves

Instrucciones

  1. Rinse the basmati rice in a fine-mesh sieve under cold running water until the water runs clear.
  2. Optional – Some cooks recommend soaking the basmati rice for 20 minutes and the draining to make the rice fluffier and less sticky.
  3. In a medium saucepan, combine the rice, water, ghee or oil, sal, semillas de comino, cardamom seeds, canela, clavos de olor, and bay leaves.
  4. Bring the mixture to a boil over high heat, then reduce the heat to low and simmer, covered, for 18-20 minutes, or until the rice is tender and the water has been absorbed.
  5. Remove the pan from the heat and let it sit, covered, for 10 minutes to allow the rice to steam and fluff up.
  6. Fluff the rice with a fork, then serve it immediately, garnished with chopped cilantro and accompanied by curry or other side dishes of your choice.

Basmati Rice Recipe Variations

You can:

  • Vary the flavor of the rice by using different spices, such as coriander seeds, fennel seeds, or black pepper.
  • Add a touch of sweetness to the rice by stirring in a little honey or coconut sugar.
  • Add a tanginess to the rice by stirring a little lemon juice or vinegar.
  • Add a touch of heat to the rice by stirring in a little cayenne pepper or red chili flakes.

Serves 6-8.

What to Serve with Basmati Rice

Basmati rice is a staple in Indian cuisine is an essential ingredient of pulaos and biryani and often complements a variety of flavorful curries, stews, and lentil dishes. One of the most popular dishes to pair with basmati rice is Chicken Tikka Masala, a creamy tomato-based curry made with tender chunks of marinated chicken. Another classic dish is Lamb Rogan Josh, a rich and flavorful curry made with tender chunks of lamb, yogurt, and a blend of spices. Vegetarian options like Chana Masala, a tangy and spicy curry made with chickpeas, or Dal Makhani, a creamy lentil curry made with black lentils and a blend of spices, are also delicious options to serve with Basmati rice. These rich and flavorful dishes perfectly complement the nutty and fragrant taste of Basmati rice, making it a perfect meal.

archivado: Recetas Indias, ingredientes

De Delhi a tu cocina: Una receta paso a paso de pollo con mantequilla

January 15, 2023 por Staff Cook

I first had butter chicken on a road trip from Mumbai to a hill station.   Late in the evening, my uncle pulled over at this restaurant in a cottage in the middle of a dark field.   Of course, it was the best dish I’ve ever had in that atmosphere.   Now I know that it’s a very popular dish in Northern India and can be found in Indian restaurants worldwide.

History of Butter Chicken

Butter chicken, also known as murgh makhani, is a popular dish in Indian cuisine that originated in the northern Indian city of Delhi. It is believed to have been created in the 1950s by Kundan Lal Gujral, the owner of a restaurant called Moti Mahal. According to the legend, Butter chicken was created as a way to use up leftover tandoori chicken.

Gujral came up with simmering the leftover chicken in a tomato-based sauce with butter and cream. The dish was instantly successful and quickly gained popularity among locals and travelers. The dish quickly spread throughout northern India and eventually to other parts of the country and the world.

What does butter chicken taste like?

Butter chicken is typically made with marinated chicken cooked in a clay oven (tandoor). It has a rich and creamy flavor with a slightly sweet and tangy taste. The tomato-based sauce is made with butter, cream, and a blend of ginger, garlic, cumin, cilantro, and garam masala. The tender, succulent chicken is then simmered in the flavorful sauce, creating a savory and sweet balance. The dish is typically served with rice or naan bread. General, it is a comforting and satisfying dish with a harmonious blend of flavors.

What is the difference between butter chicken and tikka masala?

Butter chicken and chicken tikka masala are sometimes confused. Butter chicken and chicken tikka masala are both popular Indian dishes, but they are prepared differently and have distinct flavors. Butter chicken is a dish that originated in northern India. On the other hand, chicken tikka masala is a dish believed to have originated in the UK and is heavily influenced by Indian cuisine. Butter chicken is known for its sweet, creamy, and mild taste, while Chicken Tikka Masala is known for its spicy, creamy, and tomato-based flavor.

Want to try making butter chicken at home?    One of the most popular recipes on Reddit and Youtube is from Chef Varun Inamdar.

Butter Chicken Recipe

Butter Chicken Ingredients

For the chicken:

  • 1 lb boneless chicken breast
  • 1 tbsp ginger-garlic paste
  • 1 tbsp red chili powder
  • Salt to taste
  • Oil for pan-frying

For the gravy:

  • 1 lb roughly chopped tomatoes
  • 1/2 lb roughly chopped onions
  • 1 tbsp garlic paste
  • 1/4 cup cashews
  • 1 tsp dried fenugreek leaves (kasoori methi)
  • 1/2 cucharadita de polvo Garam Masala
  • 4 tbsp granulated sugar
  • 2 tbsp Kashmiri chili powder
  • 5 tbsp butter
  • 3 tbsp heavy cream
  • 2 tbsp malt vinegar or 1.5 tbsp white vinegar
  • Salt to taste

Butter Chicken Instructions

  1. Marinate the chicken with ginger-garlic paste, polvo de chile rojo, and salt. Let it sit for 15-20 minutes.
  2. In a pan, heat some oil and pan-fry the marinated chicken pieces until cooked through. Remove from the pan and set aside.
  3. In the same pan, add the onions and sauté with a spoonful of butter. Once the onions are cooked, add the tomatoes and cashews.
  4. Add water, garlic paste, sal, malt vinegar or white vinegar, sugar, garam masala en polvo, and chili powder. Mix well and let it simmer for 15-20 minutes.
  5. Use a blender to puree the mixture until smooth.
  6. Strain the puree back into the same pan, pressing out as much liquid as possible.
  7. Add butter, cream, chicken, and dried fenugreek leaves. Let it simmer for 5-7 minutes. Garnish with cream and dried fenugreek leaves before serving.

For your convenience, we have converted his recipe for butter chicken to one that uses measurements in the English system.

We also love Serious Eats Stovetop Butter Chicken Recipe. You can also make butter chicken in an Instant Pot or Pressure Cooker.

archivado: Recetas Indias

Dale sabor a tus platos del sur de la India con el clásico chutney de coco

January 11, 2023 por Redactor del personal

coconut chutney in a bowl

Coconut chutney is a condiment popular in South Indian cuisine that is made with grated coconut, green chilies, and a blend of spices. It is typically served with rice dishes, idlis, dosas, and other South Indian snacks.

Here is a basic recipe for Indian coconut chutney:

ingredientes:

  • 1 cup grated coconut
  • 2 green chilies, finely chopped
  • 1 tablespoon chana dal (split chickpeas)
  • 1 tablespoon urad dal (split black lentils)
  • 2 tablespoons roasted peanuts
  • 1 teaspoon mustard seeds
  • 1 teaspoon cumin seeds
  • 5-6 curry leaves
  • 1 tablespoon oil
  • Salt, to taste

Instrucciones:

  1. In a pan, heat the oil over medium heat. Add the mustard, cumin, and curry leaves, and fry until the seeds start to splutter.
  2. Add the chana dal and urad dal, and fry until golden brown.
  3. Add the green chilies and fry for a minute.
  4. Add the grated coconut and fry for 2-3 minutes until it is lightly browned.
  5. Add the peanuts and fry for a minute.
  6. Remove the pan from the heat and let the mixture cool.
  7. Once the mixture is cooled, transfer it to a blender and blend until smooth, adding a little water if necessary.
  8. Season with salt to taste.

This recipe yields about 1 cup of coconut chutney, which can be served as a condiment with rice dishes, idlis, dosas, and other South Indian snacks.

Here are a few variations on the basic recipe:

  • To make a mint coconut chutney, add a handful of fresh mint leaves before blending.
  • To make a coriander coconut chutney, add a handful of fresh coriander leaves before blending.
  • To make spicy coconut chutney, add an extra green chili or a pinch of cayenne pepper before blending.

Coconut chutney can be stored in an airtight container in the refrigerator for up to 3 days. It can also be frozen for up to a month. To serve simply thaw the chutney to room temperature and serve as a condiment with your favorite South Indian dishes.

archivado: Recetas Indias

Spice up Your Meal with Tandoori Pomfret

January 10, 2023 por Redactor del personal

Tandoor Pomfret

Are you ready for something truly unique and delicious? Then look no further than this recipe for Tandoori Pomfret! Our version uses a yogurt-based spice rub to infuse the fish with flavor using an oven or you could grill it The result? An unforgettable combination of tenderness, spiciness, and smokiness that will leave your taste buds wanting more.

Tandoori Pomfret Ingredients

1 pound pomfret fillets
1 cup plain yogurt
2 tablespoons tandoori masala
1 teaspoon cumin
1 teaspoon coriander
1 teaspoon paprika
1 teaspoon garam masala
1 tablespoon ginger paste
1 tablespoon garlic paste
2 tablespoons lemon juice
Salt to taste


Tandoori Pomfret Instructions

  • Combine the yogurt, tandoori masala, cumin, cilantro, paprika, garam masala, ginger paste, garlic paste, lemon juice, and salt in a large bowl.
  • Add the pomfret fillets to the bowl and coat them evenly with the marinade. Cover the bowl and refrigerate for at least 2 hours or overnight.
  • Preheat the oven to 400°F (200°C).
  • Place the pomfret fillets on a baking sheet and bake for 15-20 minutes, until the fish is cooked and flakes easily with a fork.
  • Serve the tandoori pomfret with rice or naan bread and your favorite vegetables. Enjoy!

archivado: Recetas Indias

Wake Up to the Delicious Taste of Parsi Akuri: A Spicy Scrambled Egg Dish

January 4, 2023 por Staff Cook

Parsi Akuri

If you’re a fan of savory and spicy breakfast dishes, then you’ll love Parsi Akuri. This traditional Indian recipe features scrambled eggs cooked with a blend of aromatic spices and onions, creating a flavor explosion that will kickstart your day. The eggs are mixed with mild spices and served with bread and salad. Try making this and serve it for a lazy Sunday brunch, along with some warm toast.

Parsi Akuri Ingredients

  • 4 large eggs
  • 1 medium onion, finely chopped
  • 1 green chili, finely chopped
  • 1 tablespoon finely chopped cilantro
  • 2 tablespoons oil
  • 1/2 teaspoon mustard seeds
  • 1/2 teaspoon cumin seeds
  • 1/2 teaspoon ground turmeric
  • Salt, to taste


Parsi Akuri Instructions

  1. Beat the eggs in a small bowl and set aside.
  2. In a large skillet, heat the oil over medium heat. Add the mustard and cumin seeds and fry until they pop.
  3. Add the onions and green chili and fry until the onions are translucent.
  4. Add the turmeric and salt, and stir to combine.
  5. Pour in the beaten eggs and stir gently to combine with the onion mixture.
  6. Reduce the heat to low and cook until the eggs are cooked through and scrambled, acerca de 5-7 minutes.
  7. Sprinkle with chopped cilantro and serve hot.

This recipe should make 2 servings.

archivado: Recetas Indias Tagged With: Parsi

Authentic Kheema Pav Recipe: A Delicious and Hearty Street Food from Mumbai

January 3, 2023 por Staff Cook

Kheema in Bowl, Pav next to it

Kheema Pav is a delicious and hearty meal that combines minced meat with aromatic spices and served with soft, pillowy buns. This recipe is a traditional dish from the Parsi community in India and is popular street food in Mumbai. It is perfect for a quick lunch or dinner and will satisfy your cravings for something savory and flavorful. Give this recipe a try and transport yourself to the bustling streets of Mumbai with every bite.

Kheema Pav Ingredients

  • 1 pound ground lamb or beef
  • 1 medium onion, finely chopped
  • 1 tomato, finely chopped
  • 2 cloves garlic, finely minced
  • 1-inch ginger, finely minced
  • 1 green chili, finely chopped (optional)
  • 1 teaspoon cumin seeds
  • 1 teaspoon coriander seeds
  • 1/2 teaspoon garam masala
  • 1/2 teaspoon red chili powder (optional)
  • 1/4 cup water
  • Salt, to taste
  • Oil for frying
  • 4-6 pav buns
  • Chopped onions and cilantro for serving (optional)

Kheema Pav Instructions

  1. In a large saucepan, heat a small amount of oil over medium heat. Add the cumin seeds and coriander seeds and fry until fragrant.
  2. Add the onions, garlic, ginger, and green chili (if using) and fry until the onions are translucent.
  3. Add the ground meat and cook until it is browned, breaking it up into small pieces as it cooks.
  4. Add the tomato, garam masala, polvo de chile rojo (if using), and salt. Stir to combine.
  5. Add the water and bring the mixture to a boil. Reduce the heat to low and simmer for 20-30 minutes, until the meat is cooked through and the sauce thickens.
  6. Heat a griddle or frying pan over medium heat. Split the pav buns in half and lightly toast them on both sides until they are golden brown.
  7. To serve, place a portion of the kheema mixture onto the bottom half of each pav bun. Top with chopped onions and cilantro (if using), and cover with the top half of the bun. Serve hot.

This recipe should make enough kheema filling for 4-6 servings, depending on how much filling you put in each pav bun. You can easily adjust the recipe to make more or less by using a larger or smaller amount of ground meat and adjusting the other ingredients accordingly.

archivado: Recetas Indias

Savor the Flavor of Patra ni Machi: A Healthy and Delicious Parsi Dish Cooked in Banana Leaves

January 1, 2023 por Staff Cook

Patra Ni Machi is a classic Parsi dish with fish smeared with a generous amount of flavorful green chutney wrapped in banana leaves and steamed. Banana leaves not only look beautiful but also lend a subtle aroma and taste when foods are cooked inside them. It’s light, comforting, and satisfying, making it an excellent choice for those seeking a healthier option.

One of the standout features of this recipe is the green chutney, which is made with garlic, green chilies, mint, and coriander leaves. These ingredients combine to create a delicious and aromatic sauce that adds a ton of flavor to the dish. If you’re a fan of flavorful and healthy food, then you’ll want to give Patra Ni Machi a try.

Ingredients for Patra Ni Machi:

  • 1-pound flaky white fish, like rock cod, lingcod, snapper or sea bass
  • 1/2 cup coriander leaves
  • 1/4 cup mint leaves
  • 1/4 cup grated coconut
  • 1 green chili
  • 1 teaspoon cumin seeds
  • 1 teaspoon mustard seeds
  • 1 teaspoon sesame seeds
  • 1/4 cup water
  • Salt, to taste
  • Banana leaves, for steaming

Instructions for Patra Ni Machi

  1. Combine the coriander leaves, mint leaves, grated coconut, green chili, semillas de comino, semillas de mostaza, sesame seeds, water, and salt in a blender or food processor. Process until smooth, adding additional water to achieve a thick, spreadable consistency.
  2. Cut the banana leaves into large rectangles, acerca de 10 inches by 12 inches.
  3. Place a fish fillet in the center of each banana leaf rectangle. Spread a layer of the chutney mixture over the top of the fish.
  4. Fold the banana leaves over the fish to enclose it, forming a parcel. Secure the parcels with toothpicks or kitchen twine.
  5. Place a steamer basket in a large pot filled with water. Bring the water to a boil over high heat.
  6. Arrange the banana leaf parcels in the steamer basket, ensuring they are not touching the water. Cover the pot and steam the fish for 10-12 minutes, or until the fish is cooked through and flakes easily with a fork.
  7. Remove the pot from the heat and allow the fish to cool for a few minutes. Carefully remove the banana leaves and serve the fish hot.

This recipe should make 4 servings.

archivado: Recetas Indias

Mango Lassi: A Delicious Way to Enjoy the King of Fruits in Indian Cuisine

December 22, 2022 por Staff Cook

Glass of Mango Lassi with an uncut mango and a couple of slices of cut mango

India has a deep and enduring love for mangos, with good reason. This juicy and succulent fruit is not only delicious but is also packed with vitamins and minerals that are essential for good health. In India, mangos are enjoyed in various dishes, from sweet desserts to savory curries. They are also used to make refreshing drinks like mango lassi and mango smoothies.

But India’s love for mangos goes beyond their taste and nutritional value. Mangos hold a special place in the hearts of Indians and are often associated with fond memories and cultural traditions. In many parts of India, the arrival of mango season is a cause for celebration, with festivals and markets dedicated to the fruit.

Whether you’re enjoying a ripe and juicy mango straight from the tree or savoring the flavors of a mango-based dish, it’s easy to see why India’s love for this delicious fruit runs deep.

Mango Lassi Recipe

Lassi is a traditional Indian drink made from yogurt, milk, and various flavorings. It is a refreshing and cooling beverage, especially during the hot summer. Lassi can be made in various flavors, including sweet and savory variations. Some common flavorings for lassi include mango, rose water, and spices such as cardamom and saffron. Lassi is typically served chilled and garnished with fresh herbs or fruit. It is often enjoyed as a refreshing drink alongside spicy Indian dishes.

Mango lassi is a delicious and refreshing Indian drink made from mangoes, yogurt, and milk. Here is a simple recipe for making mango lassi at home:

ingredientes:

  • 1 cup plain yogurt
  • 1 cup milk
  • 1 cup diced ripe mango
  • 2 tbsp sugar (or to taste)
  • 1/2 cup ice (optional)

Instrucciones:

  1. In a blender, combine the yogurt, milk, mango, sugar, and ice (if using).
  2. Blend on high speed until the mixture is smooth and frothy.
  3. Taste and adjust the sweetness to your liking by adding more sugar if desired.
  4. Pour the lassi into glasses and serve immediately, garnished with a sprig of mint or a slice of mango if desired.

Note: You can use fresh or frozen mango for this recipe. If using frozen mango, you can omit the ice in the recipe. Additionally, you can use any type of yogurt you like, such as whole milk yogurt, Greek yogurt, or plant-based yogurt. Experiment with different flavors and textures to find your perfect lassi.

This recipe makes about 2 cups of mango lassi. However, the exact amount may vary depending on the size of your blender and the proportions of the ingredients you use. If you want to make a larger batch of lassi, simply adjust the proportions of the ingredients accordingly.

archivado: Recetas Indias

Indulge in the Warm, Aromatic Bliss of Masala Chai

December 18, 2022 por Staff Cook

Chai Water Color

The aroma of chai has wafted through the streets of India for centuries, enchanting the senses and warming the soul. This beloved beverage has a rich history that stretches back to ancient times when it was first crafted from aromatic spices and black tea. Over the years, chai has evolved into the rich and complex drink that we know and love today, with each region of India adding its unique twist to the recipe. From the bustling markets of Delhi to the quiet tea stalls of the countryside, chai is an integral part of daily life in India, bringing people together and nourishing the body and spirit. Whether you’re sipping a steaming cup on a chilly morning or sharing a pot with friends, chai is a timeless treasure that has captured the hearts of people around the world.

Chai is the heartbeat of India. It’s the drink that wakes us up in the morning, helps us take a break from our busy lives, and brings us together with friends and family. It’s a symbol of hospitality, a source of comfort, and a daily ritual that connects us with our cultural roots.

Indian chai, also known as masala chai, is a delicious and aromatic spiced tea popular throughout India. Here is a simple recipe for making Indian chai at home:

Chai Ingredients

  • 2 cups water
  • 2 cups milk
  • 2 tbsp black tea leaves
  • 1 cinnamon stick
  • 2 cardamom pods
  • 1-inch piece of fresh ginger, sliced
  • 2 tbsp sugar (or to taste)

Chai Instructions

  1. In a saucepan, bring the water, milk, tea leaves, cinnamon stick, cardamom pods, and ginger to a boil over medium heat.
  2. Reduce the heat to low and let the mixture simmer for 10 minutes or until the tea is brewed to your desired strength.
  3. Stir in the sugar and adjust to taste.
  4. Strain the tea into cups and serve hot.

Optional: You can add other spices to the chai, such as cloves, pimienta negra, or fennel seeds, to give it a more complex flavor. Experiment with different combinations to find your perfect chai blend.

Hace 4 cups of Chai.   If you want to make a larger batch of chai, simply adjust the proportions of the ingredients accordingly.

Calling it “chai tea” or “chai tea latte” is redundant because “chai” already means tea. It would be like calling it “tea tea” or “tea tea latte” – it just doesn’t make sense.

archivado: Recetas Indias

  • Go to page 1
  • Go to page 2
  • Go to Next Page »

Barra lateral primaria

Categories

  • Email
  • Facebook
  • Instagram
  • Pinterest
  • RSS
  • Gorjeo

Cumplir india Escuela de Cocina

Bienvenido Escuela de Cocina India! Somos un equipo de amantes de la comida y cocineros apasionados por compartir lo rico., Diversos sabores de la cocina india con el mundo.. Nuestro blog presenta una variedad de contenidos., desde recetas elaboradas por expertos y guías técnicas hasta conocimientos culturales y vistazos detrás de escena del mundo de la cocina india..

Si eres un cocinero experimentado que busca ampliar su repertorio o un principiante que busca aprender los conceptos básicos, Tenemos algo para todos. Únase a nosotros en este viaje culinario y descubra la magia de la comida india. Estamos ansiosos por compartirla con usted.!

Our Favorite Sites

  • Aarti Paarti
  • Colors of Indian Cooking
  • Easy Food Smith
  • Ekant Cook Curry
  • Hari Ghotra Recipes
  • Indian as Apple Pie
  • Indian Simmer
  • Manjula's Kitchen
  • Quick Indian Cooking
  • Reddit's Indian Cooking Community
  • Sanjeev Kapoor
  • Show me the Curry
  • Sinfully Spicy
  • Tarla Dalal
  • The ABCD's of Cooking
  • Vegetarian Recipes of India
Resumen colorido de postres indios

Postres Indios: Un dulce y delicioso viaje por el país

Descubriendo la rica y diversa historia de la cocina india en curry: Una historia de cocineros y conquistadores

Dominando a Tadka: Consejos, Trucos, y Técnicas para un Acabado Perfecto

Archivo

  • Email
  • Facebook
  • Instagram
  • Pinterest
  • RSS
  • Gorjeo

Derechos de autor © 2025 · Foodie Pro Tema por Shay Bocks · Construido sobre la el marco de Génesis · Energizado por WordPress